As part of my current research project I have tried to make photogrammetric models of various dinosaur mounts, including the MfN sauropods. That’s a bother, for a number of reasons.
First of all, photogrammetry and ribcages just don’t go together too well. That’s because you have an awful lot of surfaces – the insides of the ribs and all the vertebra centra – that’s inside, thus badly lit, and comes out very badly in the models. Bad lighting equals few points found to correlate, and thus big holes. Also, lots of floating nonsense data.
Second, when you walk around a big object with a lot of architecture in the background snapping photos, you end up filling significant a lot of pixels in your pics with said architecture. Which is repetitive: all the windows look the same. I found that this increases the risk of false-positive points, which themselves lead to misalignment of photos.
Thirdly, you’ll always have spotlights on the bones, highlighting them in part, and deep shadows on other parts. That’s a surefire receipt for getting holes in your model. And for getting a lot of junk data in shadows, like between ribs.
Thus, the attempts to get good models of the complete mounts or of individual mounted bones has been a bit less easy than I thought. A lot less easy in the case of the MfN Diplodocus mount, which is a Carnegie cast, and painted medium dark brown. I tried getting a model of the shoulder girdle and only managed to get the photos aligned so that a flat 2D surface of a low anterior view came out – basically, it looked like a photo taken from a place under the head. AARGH!
Recently, a pre-release version of the photogrammetry software I use came out. Previously, I’d been using a 0.9.something version, and was quite happy with it. But the 1.0 pre-release of Agisoft PhotoScan Professional has a lot of interesting new options. A key feature for me is the ability to compute and access a “dense pointcloud”. Previously, PhotoScan would compute it, but mesh it into a polygon mesh immediately. The point cloud was not accessible to the user.
For much of the file editing, the point cloud is entirely sufficient: removing junk, cropping, etc. And it handles a lot faster than a polygon mesh made from it. Also, while PhotoScan does a pretty good job meshing, I have software available that does it better. Thus, getting my dirty digital mitts on the point cloud is great news.
“Wait one, what is a dense point cloud?” you ask?
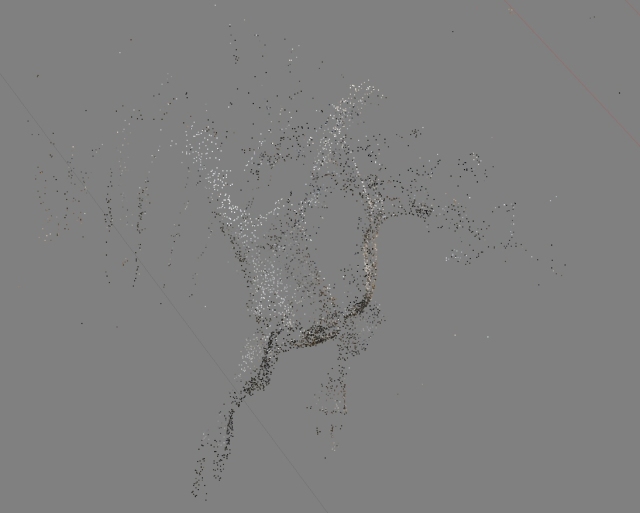
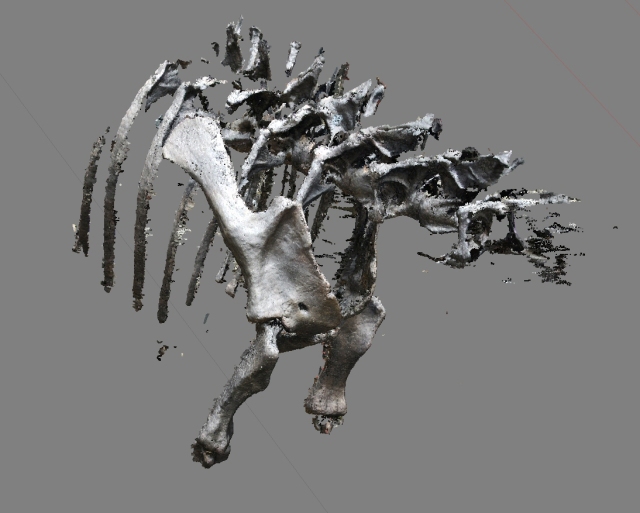
It is just what it sounds like: a point cloud in which the distance between points is small. When you create a model from photos, at first the photos need to be aligned properly: the program finds out where your camera was, and which way it pointed, when you took each photo. It does that by matching points between photos, but it uses a relatively low number of points. These constitute the sparse point cloud. It is usually has enough points to tell you if your photo alignment is OK, or totally messed up. The next step then is to calculate the dense point cloud to get a close approximation of the object. Below there is first a screenshot of a sparse point cloud, and the the dense one (medium density in PhotoScan) calculated from it.
Now, this model was obviously calculated in the pre-release 1.0 version, as otherwise I wouldn’t be able to show you the dense point cloud. And it looks really good – much better than what I described above. That is in large parts owed to the improvements in PhotoScan!
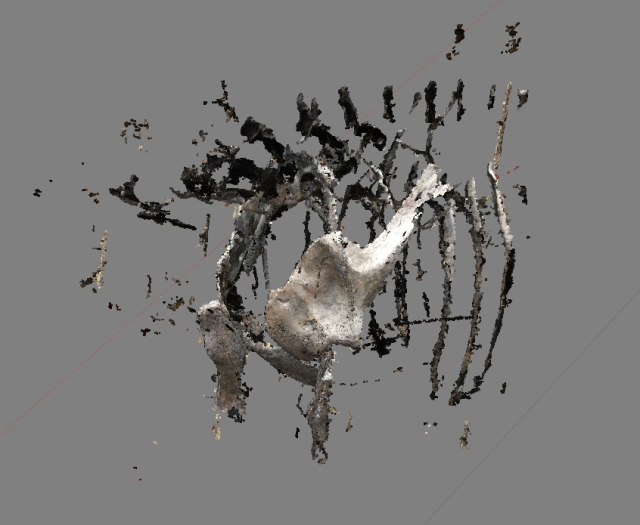
However, there is an additional element to the good result. I use a Canon EOS 650D, and this camera has a program mode for HDR photos. It takes three photos in quick succession at different ISO levels, and computes one image from them. In contrast to HDR photos one creates in an external program, these photos coming directly from the camera have EXIF data, and are thus suitable for use in PhotoScan. Although they often do not come out perfectly crisp, but looks slightly out of focus if you zoom in a lot (yes, even using a tripod), they have the huge advantage that the shadows are less dark and the highlights less bright. And that is a key advantage for photogrammetry. In fact, I ran my old photos in 1.0 of PhotoScan, too, and got back a much better result than in older version (i.e., 3D instead of flat). But I also got a model with a lot less surface represented than with the HDR photos. Whereas the right scapula and ribs were fine, the left hand side looked like this:
and the HDR version like this:
Quite a difference!
So I played around with HDR photos some more.

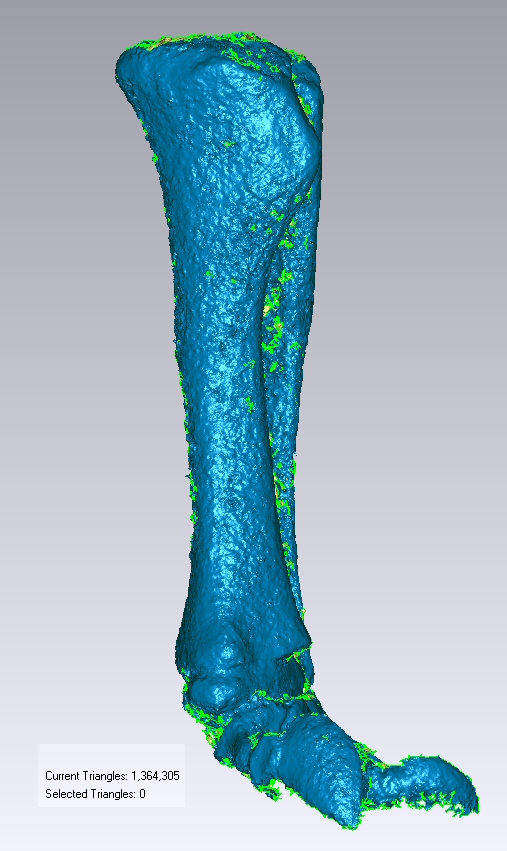
shank of the Diplodocus mount, dense point cloud.
 #
#
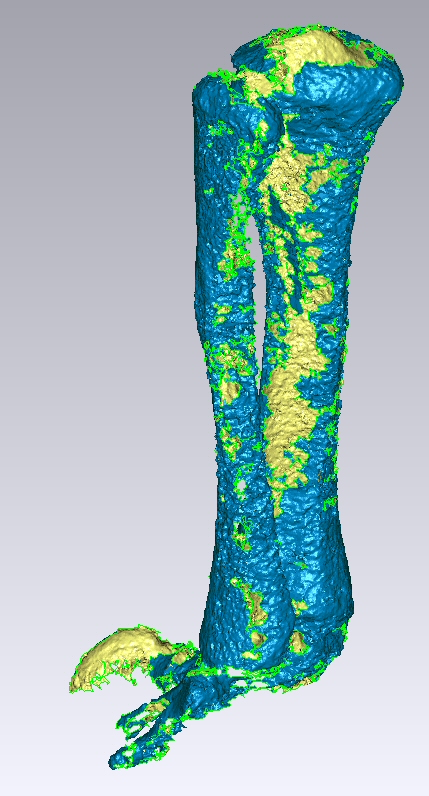
reverse side. The model looks really good on the tibial side, but not quite as good on the fibular. Same after meshing in Geomagic:
But these 3D models can be edited into something good enough for SIMM modeling with ease, and quickly! I love it!


Hmmm… if the hdrs are blurred in a fairly still environment like the museum, it might be the first photo that’s off, sic the action of triggering the photos. A cable trigger would make this more stable. (Not sure if you’ve tried that.)
I really want to try some photogrammetry, but have been unhappy with the results of 123D and co… or is that my own limited abilities?
I’d be surprised if the very slight blurriness was caused by shutter tremors or even my finger motion. I have a very good tripod, and chance would dictate that there are some photos not affected. I rather think it is the algorithm.
you can test it by launching a time-delayed hdr snapshot.
Pingback: How to Make Your Own 3D « paleoaerie